
Have you ever experienced turning on your computer, only to find an ominous glowing VGA light on your motherboard instead of the familiar Windows chime? If this has happened to you, don’t worry – you’re not alone. In this situation, you may wonder what this glowing light means and how you can make your PC operational again. To help you tackle this issue step-by-step, consider me your Ghostbuster-in-training. Let’s dive in and put an end to the spooky VGA haunting!
Getting To Know The Light
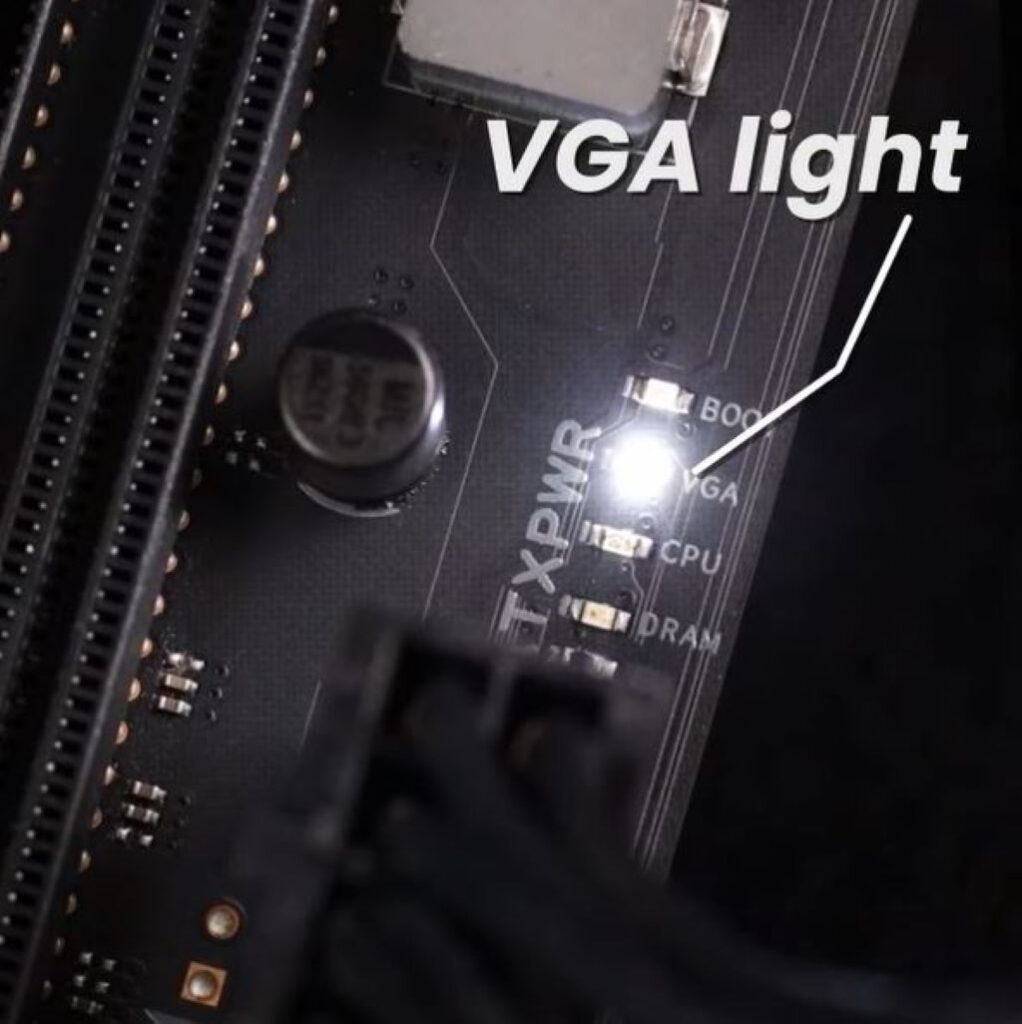
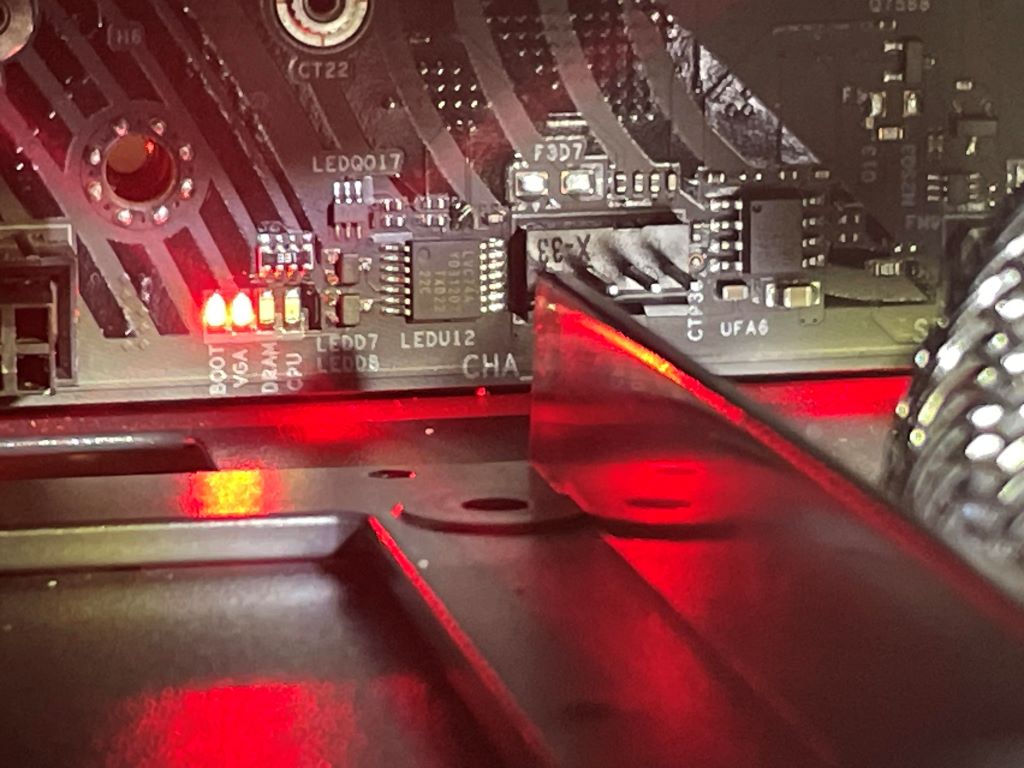
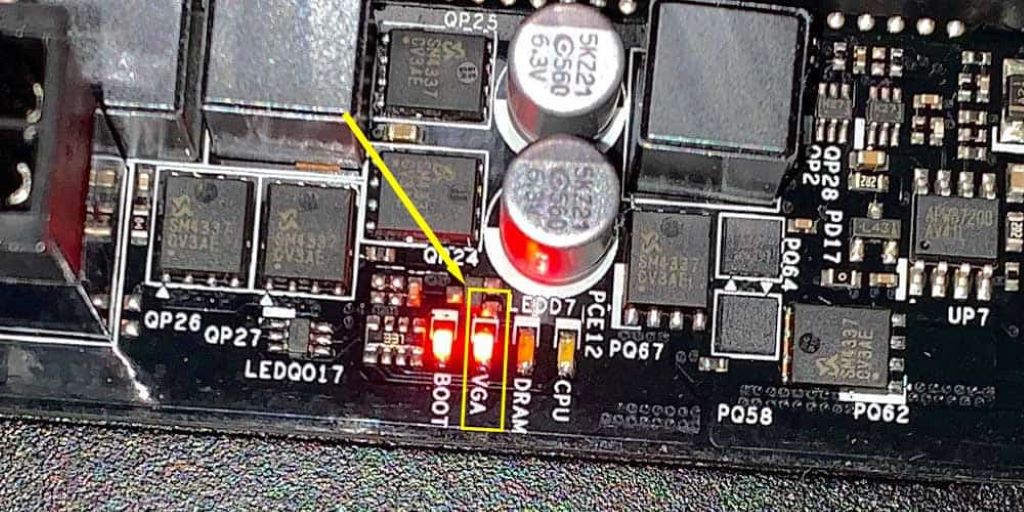
First things first – we need to understand what that scary VGA glow signifies. VGA stands for Video Graphics Array and it refers to the video card (also called a graphics card) inside your computer. The VGA light turning on indicates there’s likely an issue with detecting or using your video card correctly.
See, your video card plays a critical role – it handles processing all the complex graphics and video capabilities so your computer can display things onscreen. Without it functioning properly, you’ll never get to your desktop. Many motherboards have built-in diagnostic VGA indicators that automatically luminosity as a visual cue, “Hey! There seems to be a graphics card communication conundrum!” Pretty nifty, albeit panic-inducing.
Start With The Simple Stuff
Now before spiraling into full troubleshooting overhaul mode, let’s assess some quick and easy things we can check first. Could just be an easy fix!
Is your monitor connected properly via the right port and turned on? Ensure no cables are loose or disconnected.
Have you checked the power connections? Verify all power cables are securely inserted into the graphics card, power supply unit, and wall outlet. Rock-solid connections are critical!
Tried rebooting yet? Sometimes simply restarting or power cycling can iron out glitches. Quickly press the reset or power button for a fresh attempt at display detection.
Feeling lucky…or desperate? How about a good ol’ percussive maintenance smack? Gently tap or press along the video card and monitor connectors to re-situate connections. Hey, no judging if it works!
If none of those basics provided paranormal VGA activity relief, let’s level up our troubleshooting spirits and dive deeper!
Peer Into The Graphics Card Portal
Alright, time to turn our diagnostic sights on that suspect graphics card! Pop open your computer case and gaze within. Verify the card is fully, firmly seated in the appropriate PCIe slot. PCIe (PCI Express) is the interface that enables communication between components like the graphics card and motherboard.
While peering inside, inspect for any signs of visual distress – burnt spots, damaged ports, accumulated dust/grime. If detected, further graphics card scrutiny is needed, so exorcise it from the PC completely. More on that soon!
Summon The Spirits Of Monitor Past
Next, let’s ponder whether bringing forth the essence of monitor spirits past could conquer the curse. Do you have another (known good) monitor handy to connect as a test? Alternately, try your current display on another device like a laptop to observe if its functioning holds steady or wavers. This monitor variable swap can determine if the frightful fault lies with the monitor itself versus the computing device innards.
If another monitor also triggers Trickster VGA or yours beams steadfastly elsewhere, we can officially rule out monitor difficulties and redirect our paranormal inspection inward!
Brave The Bios
At this stage, we need to courageously delve into the basic input/output system…aka the Bios! This built-in firmware interface allows configuring your PC’s functionality at a foundational level. Access it upon bootup by pressing the designated key for your model (F1, F2, Delete are common choices) and browse for advanced graphics and PCI related settings.
Poke around for anything that seems amiss or can be adjusted to encourage display detection. Just be careful not to alter what you don’t fully understand in there! Saving changes and restarting may prompt the return of your vanished video visibility. Consider this a baseline diagnostic realm to immerse within when vexing issues arise.
Time For An Exorcism!
If no amount of prodding and testing has made that pesky VGA glow disappear, then we need to bring out the big guns – a graphics card exorcism! At this stage, all signs point to something awry with the card itself causing chaotic communication issues. Thus, full removal is warranted. Here’s the step-by-step ceremonial process:
- Unplug all power cables and switch off the PSU (power supply unit) to avoid shocking situations! Safety first when consorting with spirits!
- Release any retaining tabs or screws securing the graphics card in place, then gently ease it directly out of the PCIe housing. Take care not to disturb other fragile components behind.
- If integrated graphics are present, connect monitor display cable to motherboard rear I/O instead. If no iGPU, a temporary replacement graphics card is required for proceeding.
- Fire up the computer and see if POST (power on self test) completes fully, hopefully minus earlier VGA vileness! Successful integrated or test card graphics indicate the prior card indeed was the culprit.
Assuming minimal mobo graphics suffice temporarily, you can now seek a permanent RIP for that restless graphics soul! Either replacement or professional exorcism cleansing rituals (AKA repair) will banish its bothersome essence for good! Nice work, ghostbuster – case closed!
Summoning Shields Against Future Hauntings
Once you’ve banished this particular VGA phantom, take preventative steps to avoid repeat graphic disturbances down the road:
- Keep graphics drivers, Bios, and Windows updated to current stable versions. Updates often address compatibility issues.
- Periodically check PC interior connections and component seats to ensure tight fittings vulnerable to vibrational loosening over time.
- Consider a graphics stress test utility to analyze card stability when taxed by intense graphical workloads.
- Monitor GPU and CPU temperatures for overheating issues which can spark malfunctions.
- Use anti-static measures when handling PC internals to prevent electrical discharge damage.
Take these proactive precautions and you’ll keep ghastly graphics gremlins at bay! But if that dastardly VGA glow ever haunts again, you’re prepared to take on the troubleshooting case!
FAQs
What does the VGA light on my motherboard mean?
The VGA light indicates an issue detecting or using the graphics card in your PC. It’s a diagnostic indicator suggesting trouble communicating with the GPU.
What should I check first if I see the VGA light appear?
Start with simple connection checks like: cables fully plugged in, monitor working, graphics card fully seated, power cords not loose. A reboot or gently re-seating connections can help too.
Can a faulty monitor cause the VGA light to turn on?
Yes, a monitor malfunction can sometimes trigger the VGA diagnostic light. Try connecting a known good display as one troubleshooting step to rule out monitor issues.
What if reseating the graphics card doesn’t fix the VGA problem?
If firmly reseating connections doesn’t remedy the VGA warning, it likely indicates a deeper issue with the graphics card itself. At that point, removal and replacement of the GPU is recommended.
What preventative steps can I take to avoid VGA problems in the future?
Keeping graphics drivers/Bios updated, monitoring interior temps, periodically checking connections, using anti-static measures when handling hardware are proactive steps to avoid graphics issues down the road.
Last Thoughts
Many individuals may feel uneasy when they notice an eerie VGA glow, but there’s no need to panic. In most cases, it’s simply a matter of addressing minor connection issues, which can be easily resolved with a few troubleshooting techniques. In how to set up Project64 graphics A comprehensive guide, the first crucial step involves checking foundational elements such as cables, seats, and power leads before escalating to more drastic measures like removing or replacing the graphics card. By implementing preventative measures, you’ll be well-prepared to tackle any VGA issues that may arise while setting up Project64 graphics, ensuring a smooth and professional troubleshooting experience.